Your Intro to Bath Bomb Making!
Are you ready to transform your bath time into a luxurious spa experience right in the comfort of your own home? Look no further! Welcome to the wonderful world of DIY bath bombs! Not only are these fizzy wonders a treat for your senses, but they also make fantastic gifts for friends and family. Let's dive right in and discover how easy and fun it is to create your own personalized bath bombs.
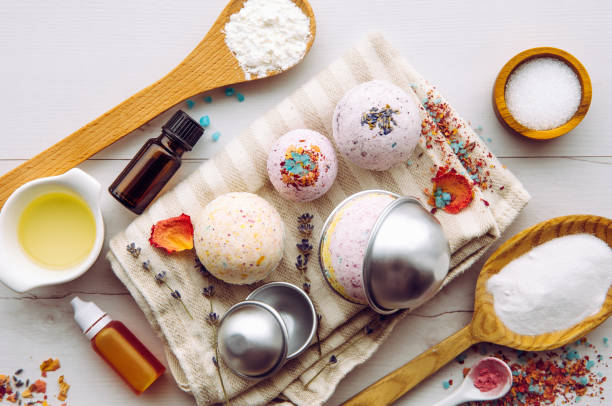
Ingredients:
- Baking Soda: The main ingredient that gives bath bombs their fizziness.
- Citric Acid: This reacts with the baking soda to create the fizzing sensation.
- Epsom Salt: Adds relaxation and helps soothe tired muscles.
- Cornstarch or Arrowroot Powder: Helps bind the ingredients together and gives the bath bombs a smooth texture.
- Essential Oils or fragrance oils: Choose your favorite scents like lavender, eucalyptus, or citrus to create a customized aroma.
- Carrier Oil: Any light and fast absorbing oil will work. Coconut oil or almond oil works well to moisturize and nourish the skin.
- Dye or Mica Powder: Optional for adding color to your bath bombs.
- Dried Flowers or Herbs: Optional for adding a beautiful visual element to your bath bombs.
Tools Equipment:
- Large Mixing Bowls: Use separate containers for dry and wet ingredients and then combine into a
large wide bowl. I use these measuring cups for my dry and wet ingredients. - Whisk or Fork: For mixing dry ingredients thoroughly.
- Spray Bottle with Water: To add water to the mixture slowly and prevent it from activating too soon.
- Molds: You can use specialized bath bomb molds or even silicone ice cube trays.
I found that moon cake press molds work well for beginners. - Gloves: Help protect your hands from getting too oily or stained.
- Parchment Paper or Silicone Baking Mat: For drying your bath bombs.
- Storage Containers: Once your bath bombs are dry, store them in dark, airtight containers to maintain freshness. I use shrink wrap to seal & store my bath bombs.
Let's Get Started:
- Mix Dry Ingredients: In a mixing bowl, combine 1 cup of baking soda, 1/2 cup of citric acid, 1/2 cup of Epsom salt, and 1/2 cup of cornstarch or arrowroot powder. Whisk together until well combined.
- Mix Wet Ingredients: In a separate bowl, mix together 2 tablespoons of melted coconut oil or almond oil with 1 teaspoon of your chosen essential oil(s). Add a few drops of food coloring or mica powder if desired.
- Combine: Slowly add the wet ingredients to the dry ingredients, whisking constantly to prevent fizzing. The mixture should hold together when squeezed in your hand. If it's too dry, you can spritz it with water using the spray bottle.
- Pack Molds: Fill your molds with the mixture, pressing down firmly to pack them tightly.
- Dry: Leave the bath bombs to dry in the molds for at least 24 hours. Once completely dry, gently remove them from the molds.
- Enjoy: Drop one of your homemade bath bombs into a warm bath and watch it fizz and release its delightful aroma. Relax and enjoy your luxurious spa experience!
**Please note, that if you plan to sell these, you will need to use weight measurements (grams, ounces, and/or pounds) for more precise and consistent bath bombs.
Pro Tips:
- Experiment with different essential oil and/or fragrance combinations to create your signature
scent. - Add dried flowers or herbs to the molds for an extra touch of elegance.
- Get creative with shapes and colors to make your bath bombs truly unique.
- Store your bath bombs in a dark, cool, dry place away from moisture until ready to use.
Now that you've mastered the art of bath bomb making, get ready to pamper yourself and indulge in some well-deserved relaxation. Your DIY creations are sure to impress, whether you're treating yourself or sharing the love with friends and family. Happy crafting and happy bathing!
Buy some of my handmade bath bombs here! - BUY NOW
**Disclosure: Some of the links in this article are affiliate links, which means I may earn a small commission if you make a purchase through these links. This comes at no additional cost to you and helps support the work I do in bringing you valuable content. Thank you for your support!


Comments
Post a Comment